One of the main reasons for those in the surveillance sector to soundproof a platform is to reduce the amount of noise any passing member of the public could hear while passing your call sign. The last thing you want when in a static location is to be compromised due to a busy body hearing you either responding to radio communications, if you are bouncing off the metalwork inside when getting ready to take the "Money shot" or taking a leak.
It will get you unwanted attention and quite possibly collapse the operation altogether. Opportunity lost along with your pay day.
So this short blog will highlight the materials and give a rough step by step guide of my soundproofing journey.
Materials used
Waterproof Insulation - £40 - B & Q
Insulation spray foam - £8 for small hard to get places - B & Q
Acoustic Foam 12 tiles £18 - E Bay
Ply Lining Kit - £120 - http://www.plyliningservices.co.uk
Veltrim and adhesive - £60 for 15 meters. - E Bay
Flashing tape x 2 £ 20 - B & Q
Carpet off cut £10 - Local shop.
Total
£ 276.
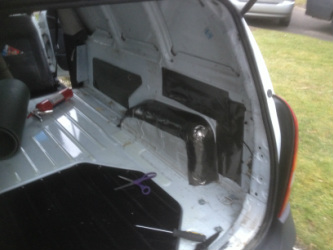
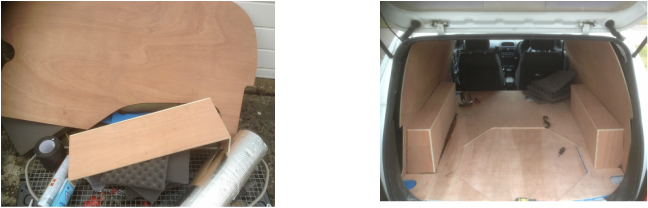
First I took all the plastic covering from inside the back of the van, around the wheel arch and took out the spare wheel exposing all the metal work.
Then I started insulating in between the first/second skin of the van with
waterproof insulation. Any hard to get areas were filled with insulation form.
Make sure you don't forget to fill the space in the floor if you have it.
Once the space between the skins are filled I started applying Flashing tape in small strips to the metal surfaces that are most prone to noise andvibration, paying particular attention to wheel arches, the spare wheel cavity and sides. Dynamat is the more expensive product on the market used by professionals but Flashing tape does the same job at half the price and you can find it in B&Q or Home base. Once all the metal work is covered I re-fitted the plastic panels back on.
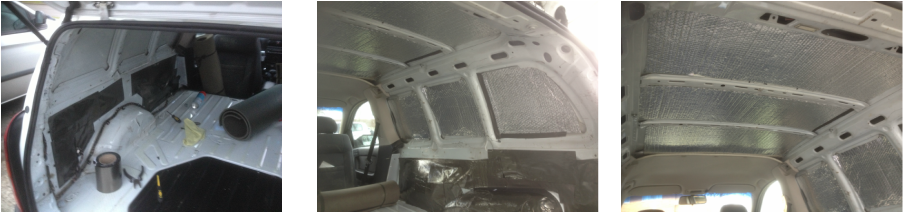
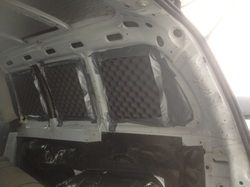
Next I applied insulation panels cut to size, followed with acoustic foam tiles to sections of the van as can be seen from the photos. These are placed to form a cushion between the covered metalwork and the ply
lining kit to be installed.
The Ply lining kit is best ordered from a Ply lining specialist. The kits are cut to the correct size and shape dependant on what type of van you have. Before fitting the Ply lining get your Veltrim and sketch the panel shape into the Veltrim for cutting later.
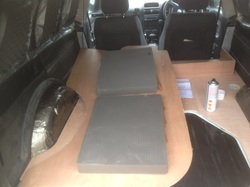
I used some old Roll mats as a cushion for the flooring making sure to cut the mats around the spare wheel as you will want ease of access to the spare. The ply flooring is then screwed in place followed with the side panels and finally the wheel arches. Silicon is then used to seal between all the spaces and joints. Leave over night to harden then move onto the Veltrim the next day.
I used some old Roll mats as a cushion for the flooring making sure to cut the mats around the spare wheel as you will want ease of access to the spare. The ply flooring is then screwed in place followed with the side panels and finally the wheel arches. Silicon is then used to seal between all the spaces and joints. Leave over night to harden then move onto the Veltrim the next day.
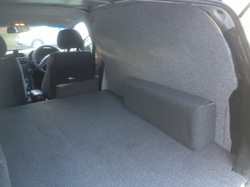
If you order Veltrim off E Bay you will get at least six cans with the order. This will be plenty if you have an Astra van. The sides are first to be sprayed and the Veltrim fixed on, spraying small sections at a time making sure to stretch the material around the edges and hold with strong clips until the adhesive does its job. repeat the process until you have covered the sides, wheel arch boxes and top in Veltrim. I used a hard wearing dark gray bog standard carpet for the floor, again using roll mats as an underlay between the ply and the carpet.
Thats the soundproofing complete, Job done !
Thats the soundproofing complete, Job done !

 RSS Feed
